Inquiry
Form loading...

Why Is My Weather Stripping Door Seal Not Working?

A failing Weather Stripping Door Seal can make a comfortable room feel unexpectedly cold. You may notice daylight near the frame, a paper that slides freely, or whistling wind around the latch. These small clues often reveal a larger air-leakage problem. The U.S. Department of Energy reports that air leakage can represent 25% to 40% of the energy used for heating and cooling in a typical home. That makes a damaged door seal more than a minor maintenance issue.

The problem is not always the seal itself. Compression may be uneven, the door frame may have shifted, or the threshold may sit too low. ENERGY STAR guidance states that sealing air leaks and improving insulation can reduce household heating and cooling costs by about 15%. However, replacing the strip without checking alignment may produce little improvement. It looks fixed. It is not.

This guide examines practical causes, including worn foam, incorrect sizing, moisture damage, and installation gaps. It also considers findings from the U.S. Department of Energy’s air-sealing guidance and ENERGY STAR’s residential efficiency recommendations. ASHRAE research further emphasizes that uncontrolled infiltration affects comfort, indoor conditions, and energy performance. A careful inspection matters. Start with the corners. Check the latch side. Feel for moving air with a smoke pencil or a thin tissue. Some symptoms overlap, so the first explanation may be wrong. That is worth remembering before buying another seal.
Why Is My Weather Stripping Door Seal Not Working?

How a Weather Stripping Door Seal Works

A weather stripping door seal works by creating controlled contact between the door and frame. When the door closes, flexible foam, rubber, or a brush fin compresses against the jamb. This contact blocks moving air, rain splash, dust, and some outdoor noise. Not a wall. Its effectiveness depends on even compression along the entire perimeter. If one section barely touches, air can travel through that small channel and make the whole door feel defective. A simple tissue test often reveals this. Close the door on a tissue strip, then pull gently. Loose areas need attention.

A working seal must compress slightly, not flatten completely. Excess pressure can prevent the latch from engaging, while insufficient pressure leaves drafts. The bottom seal usually meets the threshold, where dirt, uneven flooring, or a warped door creates a visible gap. Check the corners. They are common failure points. Clean the contact surfaces before judging the material, because grit can hold the door open by a fraction. I once blamed worn stripping, then discovered loose hinge screws had shifted the door. That mistake was useful. Check alignment, fasteners, and the threshold before replacing anything. If the strip is cracked, permanently crushed, or detached, replacement is reasonable. Measure the gap first. Seal profiles vary, and a thicker piece is not automatically better. It may make the door bind, especially in humid weather. A reliable repair leaves consistent contact and allows the door to close without force.


Common Signs Your Door Seal Is Failing

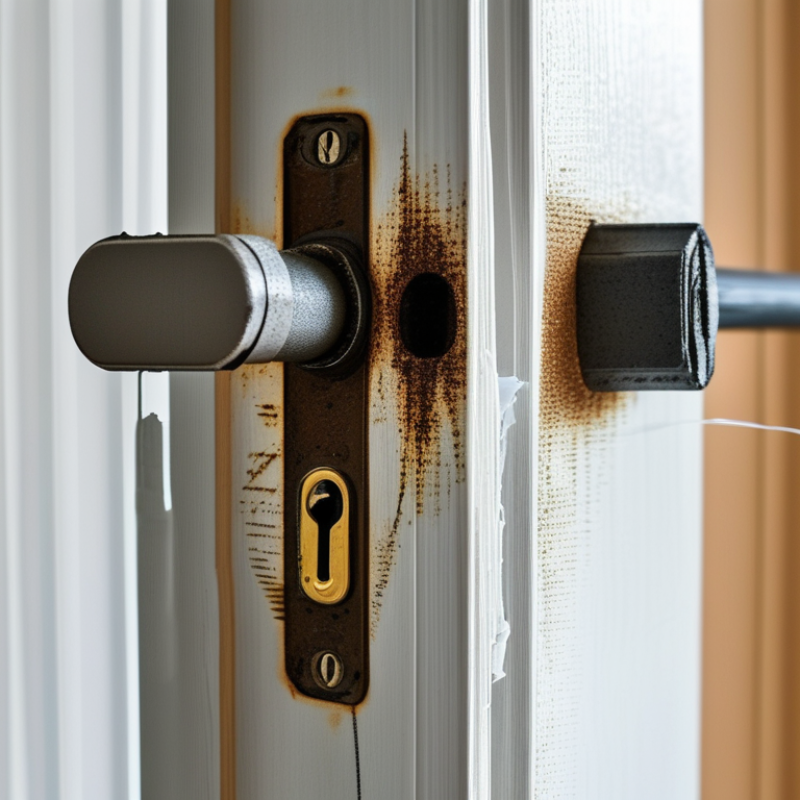
A failing door seal often announces itself through small, annoying changes. You may feel a cold draft around the door edges, especially on windy days. Light may appear beneath the threshold. Rainwater can also leave damp marks near the frame. These signs suggest the weather stripping is compressed, cracked, loose, or incorrectly aligned. A good seal should close evenly without forcing the door.

Noise can reveal another problem. Outdoor traffic, insects, and hallway sounds may become noticeably louder. Your heating or cooling system might run longer than usual because conditioned air escapes through the gaps. Touch the seal with your hand while the door is closed. Cold air, visible movement, or uneven pressure indicates a weak contact point. Sometimes the door itself has shifted, so replacing the seal alone may not solve everything. I have seen people blame worn stripping when loose hinges caused the real gap.

Tips: Clean the frame before inspecting it. Check for flattened rubber, torn corners, and missing sections. Close the door on a sheet of paper. If the paper slides out easily, the seal may need adjustment or replacement. Measure each side separately, because older frames are rarely perfectly square. Avoid stretching the material during installation; that mistake can create gaps at the corners.

Why Is My Weather Stripping Door Seal Not Working? - Common Signs Your Door Seal Is Failing

Common Sign What It Usually Indicates Simple Check Likely Condition Recommended Action Priority
Daylight is visible around the closed door The seal is not making continuous contact with the door or frame. Inspect the entire perimeter from inside the room during daylight. Compressed, incorrectly sized, or displaced weather stripping. Realign the seal or replace it with a correctly sized profile. High
Cold air can be felt near the door edges Air is entering through a gap in the side seals, top seal, or threshold. Move a thin strip of tissue around the closed door on a windy day. Loss of compression or an uneven door-and-frame fit. Check the hinges, latch alignment, perimeter seal, and door sweep. High
The seal is cracked, brittle, flattened, or torn The sealing material has aged and can no longer recover its original shape. Gently press the seal and look for cracks, permanent dents, or surface damage. Normal wear, temperature exposure, or repeated compression. Remove the damaged section and install a compatible replacement seal. Medium
The door must be forced or slammed shut The replacement seal may be too thick, or the door may be misaligned. Close the door slowly and observe whether the seal rolls, folds, or resists the latch. Excessive compression, incorrect seal profile, or loose hinges. Verify the seal dimensions and adjust the hinges or latch if necessary. Medium
Water enters during rain or around the threshold The bottom seal, threshold, drainage path, or exterior flashing may not be controlling water properly. Inspect after rainfall for wet marks and check whether the threshold drains outward. Worn door sweep, damaged threshold, blocked drainage, or poor alignment. Replace the sweep, clear drainage openings, and repair damaged threshold areas. High
Outside noise or light passes through easily Open gaps are reducing the door assembly's ability to block air and sound transmission. Check for visible gaps and listen for increased noise near the seal line. Incomplete perimeter contact or gaps at the corners. Seal the corners carefully and ensure the top, sides, and bottom overlap correctly. Medium
Dust, insects, or debris collect along the door edge Small openings are allowing air movement and entry from outside. Clean the area, close the door, and check where debris reappears. Gaps at the lower corners, worn sweep, or a seal that has pulled loose. Secure loose sections and replace the lower seal if it no longer contacts the threshold. Medium
Condensation or moisture appears near the frame Air leakage may be creating a cold surface, although indoor humidity or other moisture sources may also be involved. Check the seal for gaps and compare the area with nearby windows or walls. Failed seal, thermal bridging, high indoor humidity, or water intrusion. Repair visible seal gaps, dry the area, and investigate persistent moisture promptly. High

Note: A door seal should make consistent, light contact around the frame without preventing the latch from engaging. Persistent water damage, rot, or difficult operation may require professional inspection.

Main Causes of an Ineffective Weather Stripping Seal

Why Is My Weather Stripping Door Seal Not Working?

Main Causes of an Ineffective Weather Stripping Seal

A door seal can look intact and still allow drafts. The main causes include incorrect size, poor compression, damaged corners, and an uneven door frame. A worn strip may leave a narrow gap near the latch side or bottom edge. Cold air enters there quietly. The U.S. Department of Energy notes that air leakage can account for 5% to 30% of a home’s energy use, depending on construction and climate.

Incorrect compression is another common problem. If the seal barely touches the frame, it cannot block moving air. If it is crushed flat, the door may not close properly, and the material loses resilience. Check the entire perimeter with a thin piece of paper. It should resist removal when the door is closed. Many installers miss the corners.

Surface condition also matters. Dust, old adhesive, moisture, or peeling paint can prevent proper bonding. A threshold that has shifted can create a larger gap than the weather stripping can handle. I have seen homeowners replace the strip repeatedly when the real issue was a sagging door. It is easy to blame the material. That is often wrong.

ENERGY STAR reports that air sealing can reduce annual heating and cooling costs by up to 15%. Use a smoke pencil on windy days to locate escaping air. Then inspect the hinges, latch alignment, threshold, and seal profile before buying replacement material. The wrong profile will fail quickly. Sometimes, the frame needs adjustment first.

Why Is My Weather Stripping Door Seal Not Working?

The most common reasons for an ineffective door seal are damaged or compressed material, gaps at the corners, poor door alignment, and weather stripping that is too small or incorrectly installed. The chart shows a practical diagnostic priority score from 1 to 5, not a market survey.

Start by checking the entire perimeter for visible gaps, then inspect the corners, threshold, and door alignment. Replace weather stripping when it is cracked, permanently flattened, loose, or no longer makes consistent contact with the frame.

How to Inspect the Door, Frame, and Seal

Why Is My Weather Stripping Door Seal Not Working?

A failed door seal is not always caused by worn weather stripping. The door may sag, the frame may twist, or the latch may not pull the door tightly closed. Inspect the entire opening before buying replacement material.

Close the door slowly and watch the gaps. Check for daylight around the top corners, hinge side, and threshold. Run your fingers along the frame to feel drafts. A strip of paper should resist slightly when trapped between the seal and door. If it slides out easily, the compression is weak. Examine the seal for cracks, flattened sections, loose adhesive, or hardened edges. Also inspect the door frame for bent metal, swollen wood, and loose screws. A damaged frame can defeat a new seal.

Look closely.

Tips: Clean dust from the frame before testing. Tighten loose hinge screws and confirm the door sits evenly. Measure each side separately, because old openings are rarely perfectly square. Do not stretch rubber or foam during installation; it can shrink back and create gaps. I have sometimes blamed the seal too quickly, when the real problem was poor alignment. Recheck the latch after every adjustment. A seal should compress gently, not require force to close the door. If the threshold is uneven or the frame has shifted, replacement weather stripping alone may only hide the problem briefly.

Steps to Repair or Replace the Door Weather Stripping

Why Is My Weather Stripping Door Seal Not Working?

Steps to Repair or Replace the Door Weather Stripping

A door seal may fail because it has compressed, torn, or shifted from its channel. Dust around the frame can also prevent a tight contact. Close the door slowly and inspect the entire edge. Look for daylight, loose fasteners, or a flattened rubber strip.

A simple paper test helps. Place paper between the seal and door, then close it. If the paper slides out easily, that section needs attention.

Start by cleaning the frame with mild soap and a dry cloth. Remove loose adhesive or dirt carefully. Tighten missing screws, but do not overtighten them. The seal should remain flexible. If one area is bent, warm it gently and reshape it by hand. This may help temporarily. It may not last.

Replace the strip when it is cracked, hardened, or permanently crushed. Measure the top and side sections separately, because doors are not always perfectly square. Remove the old material without damaging the frame. Cut the replacement slightly longer, then trim the ends for a snug fit. Install it without stretching the strip. Stretching can create gaps later. After installation, close the door and check for even resistance. I once ignored a small corner gap, and cold air still entered. Recheck the corners, latch side, and threshold after several days. Door movement can reveal problems missed during the first inspection.